Thursday, August 13, 2015

Git : How to merge your silly little commits into one .

There are three kinds of git users . People who commits every single change ; People who wait and compile all the changes into one gigantic commit . And the last kind is the best kind , who commits in a responsible way. I used to be the first kind , but realized later it is annoying to the people who reviews my PR's . So i did some digging and as always git has the answer to almost all of your problems (May be not how to deal with a breakup with your girlfriend . In that case Git cannot help ya :( ) . So here is the thing , git has 2 helpful ways of dealing with this problem .


  1. Using squash mechanism
  2. Using good old git reset


Here is the scenario . Say if you made some commits with small changes like remove small space 1 , change variable name , remove space 2 . Later you realize the commits are kind of silly , you want all these commits to be merge into one called something like code cleanup .

Using squash for this problem a bit complex (not if you get used to it) . But it sort of gives you an overall idea on what is happening . This is how you do it .

Method 1 : Using squash mechanism


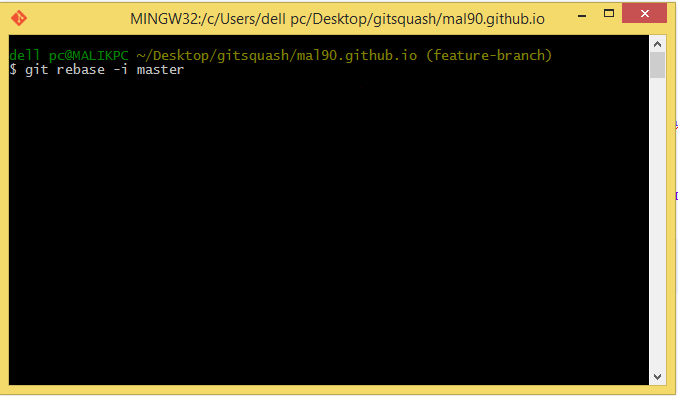
First of all make sure your master branch is up-to date with the related upstream branch . And say you are in a feature branch called , well feature-branch .

in your git bash , run this command git rebase -i master


you will get the vim interactive console and you will see all of your 3 commits listed


Here the process is simple . You can pick one commit which can be your parent commit  using pick, and the rest of the commits can be linked under this parent commit using squash command . Also you can change the order of the commits as well . So according to our scenario , we can do something like this ...


So yeah that is it . Just save and exit . And you will get another interactive console like below ..


You can just skip this window by just quitting without save or you can give new names to your commits . So here i am renaming the top most commit (which is my parent commit of all 3 commits) as Code cleanup . And again save and exit .. You will see something like below ..


That's it , you have successfully merge 3 of your silly commits into one commit which is going to make a better commit history for you . Now you can just use git push origin feature-branch --force to push your single commit to the remote repository .

Note : we are using --force because this process has changed the commit hashes . In any case , when you use force push , you need to absolutely make sure you know what you are doing .

If you go to your repository and view the commit history , you can see the squashed commits like this visualized in a different way ..


So that's how you squash your commits in Git . It is a bit time consuming process , but if you get used to it , it is very useful .

Method 2 : Using good old git reset


So unlike squashing your commits , you can easily merge your little commits into one using git reset command . It is really simple . Take the same scenario i have mentioned above . Now what you need is , Taking the HEAD position 3 commits back . By doing this you are resetting the last 3 commits .

git reset --soft HEAD~3

Now you have un-stage changes . All you need to do now is to put them into a single commit

git commit -m "Code cleanup"

Or better way , merge these 2 commands into one

git reset --soft HEAD~3 && git commit -m "Code cleanup"

There you go  ! That's it . now push --force to push the new commit into the remote repository . The same warning regarding force push applies here as well .

The awesome thing about these 2 methods is that you can change the commits even after you have pushed the changes into the remote repository . So don't worry , it is never too late with git .

more info on squashing can be found here

Friday, August 7, 2015

How to face software engineering internship interviews ?

I got the opportunity to do few interviews and mock interviews for the interns who were trying to get into the Industry as trainees . What i have noticed from the candidates are that they are extremely skillful , had good academic track records and some of them are very good at problem solving . However what i didn't see was the preparation to face an interview . When the most common questions were asked , i saw the lack of ability to tackle those questions mainly due to the absence of preparation . So i thought of writing few tips on how to tackle an internship interview.


How to face it better ?


First things first : You should prepare a small "about-yourself " description to introduce yourself to the interviewer . Because the first question would almost always be something like "Can you first tell us about yourself a bit" . This is something everyone easily messes-up  because it is so obvious !

Stick to the script : When you introduce yourself to the interviewers , make sure to keep it short and sweet . It should be relevant to the internship . For example after stating the basic information (name , age , where you live ) , go with your overall academic records , projects you have done , any important contributions you have done to the IT community (such as open-source contributions , tech publications) , any interesting hobbies and a bit about why you selected this field . You might not want to share your pet's name , what your parents doing for a living .

Bring a copied CV : This is important and is something always expected from a interviewee .

Loud and clear : Some people are naturally soft spoken . But when it comes to interviews you need to make sure what you are saying is delivered to the interviewer . If the interviewer had to ask you again and again for something , it will create a negative impression . It will also show you that you are not in cable of having a efficient communication .

Confidence and eye-contact : Don't bore your interviewer by acting slow and dull . Show your enthusiasm in your voice and always keep a good eye contact .

Be honest : When you are asked about something about your self , make  sure you give the correct details . If you are not being honest at that time and if the interviewer later found out that you gave out incorrect details , you are done .

About your projects : Always have a look at the overall information about your university projects and you need to prepare for this before coming to the interview . There will be a question like "Tell us about your university projects" , So in that case it is important that you know how to explain what you have done . You might have done several projects , in that case , select one . 3 things need to be said during this question.
           1. Project description (domain , techs used , overall system architecture)
           2. What is your contribution
           3. Problems faced and the assumptions made

Think out loud : You will be given some kind of problem/scenario where you are required to provide a solution . The solution might be some pseudocode/algorithm or some high-level system design . Sometimes what happens is that you think about a solution in your head without expressing it ,Which will result in a uncomfortable silence between you and the interviewer . In this case a pen and paper might come in handy . You can sketch it and show as to how you will approach the issue . So the interviewer will know you got the idea.

Keeping your self updated : When it comes to IT field , It is imperative that you know a bit about the latest techs and trends . So always keep your knowledge polished by readings blogs , magazines etc. Also having a basic knowledge about the company is a must . Go through the company's website , Facebook page , LinkedIn or another SM accounts and get an overall idea as a part of the preparation for the interview .

Social media profile : Having a LinkedIn profile is a good way of marketing your self for a job . Remember to include this in your CV . Also if you managed a blog , if you have a stackoverflow or a github account , share it with your interviewer . This will help him to understand your skills better.

Passion and Mission : Another obvious question is "How do you see yourself in n number of years" . Always prepare for this question before the interview . Also your plans should be relevant to the internship and the field . "I want to buy a car and go around the world" is wrong kind of answer !

Ask questions : Interviewer :Do you have any questions to be asked from us ? " . Keep at least two questions prepared to ask at this point which also needs to be relevant to the context .
For Example :

  •          What are the new projects are being developed by your company ?
  •          How this place will help me to improve my career path ?
  •          If i get selected , what projects would be assigned to me ? what kind of part would i play in the company/project ? 


Few things you shouldn't do ..


Asking personal questions : Interviews are for professionals so act like one.

Lying about the qualifications : If you have a 3.45 gpa, then it is what it is . Do not round it to 3.50. Always be honest.

Do not "build" answers : If you were asked about a technical question and if you don't know anything about it , do not try to build a fake answer just for the sake of it . Remember your interviewer knows his stuff . Lying about something you don't know is a waste of time and you will lose your integrity at the very moment .

Don't ask about the salary : In your first interview for internship , asking about the salary is probably not a good idea .


Tuesday, July 7, 2015

When to use Git rebasing and why ?

note : My earlier post was about some of the useful commands of git and how to use them

Git rebase : introduction


Git rebase is a handy mechanism when you need merge the changes of your branch with another branch (probably with the master branch) . But the process behind a git-rebase is not that simple as the definition suggests , but it is clean and awesome . In this post , I am going to go through with the process behind a git rebase , when to use it , and when to avoid it .

Let's look at the following simple scenario..

Say you have a master branch called master .. (duh)

And you are creating a development-branch out of this master branch to do your development stuff.


And you are now working on this development-branch for sometime . You make changes , you add these changes and you commit those changes to this branch . Now after few days , you decides that it is the right time to integrate your changes to the master branch . But guess what , your team members have already pushed their changes to the master branch . So you cannot just easily merge your changes to the master without messing up the changes of your peers . Following diagram illustrates the situation


As you can see there is a gap between the branch you are working on and the master . This is where the it rebase comes in .By using git rebase you are going to integrate your changes (commit B1 , B2) with the master (Where now the head is located at commit M3) , 


Now the situation changes to something like below


When you use git rebase , the commit history (commit hashes) changes entirely . That is why i have used the green color to represent the history instead of blue (color of master's commits) or red (color of development-branch commits).

The Advantage 


It creates a linear History which is the very reason why we need to use git rebasing. Your history is clean flat and readable . You can identify the commits of each of your team members very easily in different timelines .


The Disadvantage

In a situation where you have so many people consistently pushing their changes to master and when there are so many branches being merged with the master , It is kind of a pain in the a** to keep your branch upto date with master using git rebase . You have to constantly do the rebasing , and might need to resolve conflicts time to time 

Also rewriting your commit history after each and every reabsing is not always a good thing . It means that your commit hashes change consistently and also , you need to force push every time to the remote after a rebase

When to use git rebase : Only when you need a clean linear history so that you can clearly see what is going on with the all the commits from all the team members


When not to use : If you prefer to follow a simple mechanism where you can integrate your changes with the upstream branch without a fuss you can always go with git merge 


Saturday, June 27, 2015

Useful git commands

Lets have a look at some of the useful git commands 


Get a clone of the remote repository

  • git clone <remote repository link>

Get a pull from the remote branch

  • git pull <remote branch name>

Get a pull from the remote branch and rebase the remote branch with the local branch

  • git pull --rebase origin <branch name>

Get all the branches from the remote repository 

  • git fetch --all


Push the changes to remote

  • git push origin <branch-name>
  • git push origin <branch-name> --force #force push the changes


Checkout a branch

  • git checkout <branch name>

Checkout a new branch from the current branch

  • git checkout -b <branch name>

Add a file to commit

  • git add  <filename> #Adds 1 file
  • git add --all #Adds all the files including tracked and un-tracked files

Commit with a message

  • git commit -m "message name"

Stash the current changes and make branch pristine

  • git stash

Un-stash the last changes which were stashed ( hence make the branch dirty)

  • git stash apply

Delete branch


  • git push :<branchname> # delete remote branch name
  • git branch -d <branchname> #delete local branch name
  • git branch -D<branchname>#force delete local branch name 


Change the last commit message 

  • git commit --amend -m "New commit message"


Change remote branch name 

  • git branch <new-branch-name> <origin old-branch-name> #change remote branch name with the new name
  • git push origin <new-branch-name> #push the new branch with the new name
  • git push origin :<old-branch-name> #delete the old branch branch
  • git push -D <old-branch-name>


Change local branch name

  • git branch -m <old-branch-name> <new-branch-name> #If you want to rename any branch
  • git branch -m <new-branch-name> #If you want to change the current branch


Reset last commit 


  • git reset --hard HEAD~1
  • git push origin <branch-name> --force # This step will push the reverted changes back to the remote


Reset last commit but keep the changes in local branch

  • git reset HEAD~1


Rebase your current branch changes with the local master branch

  • git rebase origin/master


Merge your changes with the master branch

  • git merge <branch-name> --no-ff  #Creates a commit for merge and does the merge with fast-forward mechanism


Get git commit history in a compact way

  • git log oneline

Friday, June 26, 2015

Git rebase merge conflict solving : Did you forget to use add ?

Sometimes when you rebase your branch with the master branch and after fixing a merge conflict you might encounter following issue


The loopy problem of git rebasing


$ git rebase –continue

Applying: loglevel equal to silent
No changes – did you forget to use ‘git add’?
If there is nothing left to stage, chances are that something else
already introduced the same changes; you might want to skip this patch.


When you have resolved this problem, run “git rebase –continue”.
If you prefer to skip this patch, run “git rebase –skip” instead.
To check out the original branch and stop rebasing, run “git rebase –abort”
.


But the problem you might having is that you have already added the file using git add <yourconfilctedfilename>  And might have added several times but still Git telling you to add the file again ??

Sometimes you got to skip your problems , bro

I have encountered this issue couple of times and it turns out is a Git bug which was later fixed with Git 2.0.2 version. So anyway in this case rather than updating your git application , you can simply do ..

git rebase –skip 

and just skip the patch. It will not do any harm because the patch was empty anyway ! 

How to set Visual Studio Version With NPM

When you install NPM modules in windows environment  , some times you might ran into an error like below.

C:\Program Files (x86)\MSBuild\Microsoft.Cpp\v4.0\V120\Microsoft.Cpp.Platform.targets(64,5): error MSB8020: The build t
ools for Visual Studio 2010 (Platform Toolset = ‘v100′) cannot be found. To build using the v100 build tools, please in
stall Visual Studio 2010 build tools. Alternatively, you may upgrade to the current Visual Studio tools by selecting t
he Project menu or right-click the solution, and then selecting “Upgrade Solution…”. [C:\Users\Documents\FLIS.Client.Tests\
node_modules\karma\node_modules\socket.io\node_modules\socket.io-client\node_modules\ws\build\bufferutil.vcxproj]

As you can see the error says that it cannot find the Visual studio 2010 platform toolset. In a scenario like this you can externally specify build platform toolset to NPM like this.

–msvs-version=2013 // I am running visual studio 2013 . So…

Say For E.g If you want to install protractor with –msvs-version=2013 

npm install protractor –msvs-version=2013

Difference between $scope and $rootscope

This article is written assuming you have the basic concepts of AngularJS !


Whenever you declare a controller in angular , you automatically create a $scope . So what does a $scope mean : “$scope is an object that refers to the application model. It is an execution context for expressions. $scopes are arranged in hierarchical structure which mimic the DOM structure of the application. $scope can watch expressions and propagate events.” documentation .

In simpler terms it means that it is a way of tying an object to the DOM . If you consider the MVC model in Angular , the scope acts as a model . It is a template which hosts all the functions and the related data . 

Okay now that we have gotten some insight into the $scope , let talk about $rootscope shall we ? $rootscope is the parent (more like a root parent ) of all the $scopes you create . It is the ultimate boss . It is (almost) like the Object class of Java .It is the top most $scope of your app and it contains ng-app directive . There is only one $rootscope for each of the Angular application .